
Learn how to make miniature dollhouse furniture, mini paper accessories and get techniques, tips and monthly tutorials.
Sunday, September 3, 2017
Saturday, September 2, 2017
HOW TO AGE AN UPHOLSTERED CHAIR
Before going into the tutorial I would like to point out a little change at the top of the blog. I have added some new pages under the title banner. These pages have enlarged pictures and only pictures of the kits I make and sell through Hobby Builders Supply, www.miniatures.com
I know the pictures that are in the kit's instructions are small and if you are unfamiliar with building and upholstering a piece of miniature furniture this can be confusing. If you have purchased a kit feel free to click on your kit and use the enlarged pictures to help you with finishing your piece of miniature furniture.
As always I invite you to contact me if you have any problems. I want you to be successful and I will be very happy to help you. camceiling@frontiernet.net is my e-mail address.
Working on clearing up the pictures on the future kits but I wanted to make available the enlarged pictures for you.
I would also like to mention that I use only 100% cotton fabric for upholstering. I do not buy this on the internet. I do forget that not all people are familiar with fabric stores or fabric departments. I love fabric, I used to own a fabric store and I taught quilting. Please, when looking for fabric to upholster your miniature furniture use 100% cotton at least for the first time. Other fibers are difficult to glue and will just make everything harder for you.
Quilt shops, Joann's, Hobby Lobby and of course Walmart have 100% cotton fabric for quilting. Take a piece of furniture with you so you can judge if a print or stripe will be the correct scale and when it comes to upholstering that is a personal choice.

I am showing you pictures of my Halloween chairs that I used to sell all ready upholstered.
This chair is available as the Estate chair, #1229 from Hobby Builders.
Remember, I buy my fabrics from quilting stores, Joann's and Walmart.

This would probably be considered a medium scale print but on this chair the print worked just fine.
Be sure to take a piece of miniature furniture with you when you are choosing fabrics.

 I have made a kit of the Queen Anne Wing Chair that I use to make "Lottie's Chair" and the "Bits and Pieces" chair.
When I began the kits I had miniaturists ask if I was going to have this kit available, I do and you can order it from Hobby Builders Supply, item #1241.
I am going to show you how I age this chair. No, I am not giving a pattern. I am showing you a technique that you can use on other upholstered furniture not just this piece.
I will also show you how to steam an afghan in place.
The bottom picture is of the "Bits and Pieces" chair. This also can be aged or just sat in like the bottom picture shows.
The books being used are from the how to on books, that is listed on the left, "Things to do, Things to see".


I am keeping a promise to some miniaturists by making a tutorial on how to make "Lottie's Chair" from the Queen Anne Wing Chair kit.
Again, I am not including a pattern for those that do not have the kit. I am showing you the steps I take to age using sand paper and chalk. You can take off a front or back leg and use books to prop up your chair. I also show you how to steam an afghan into place.
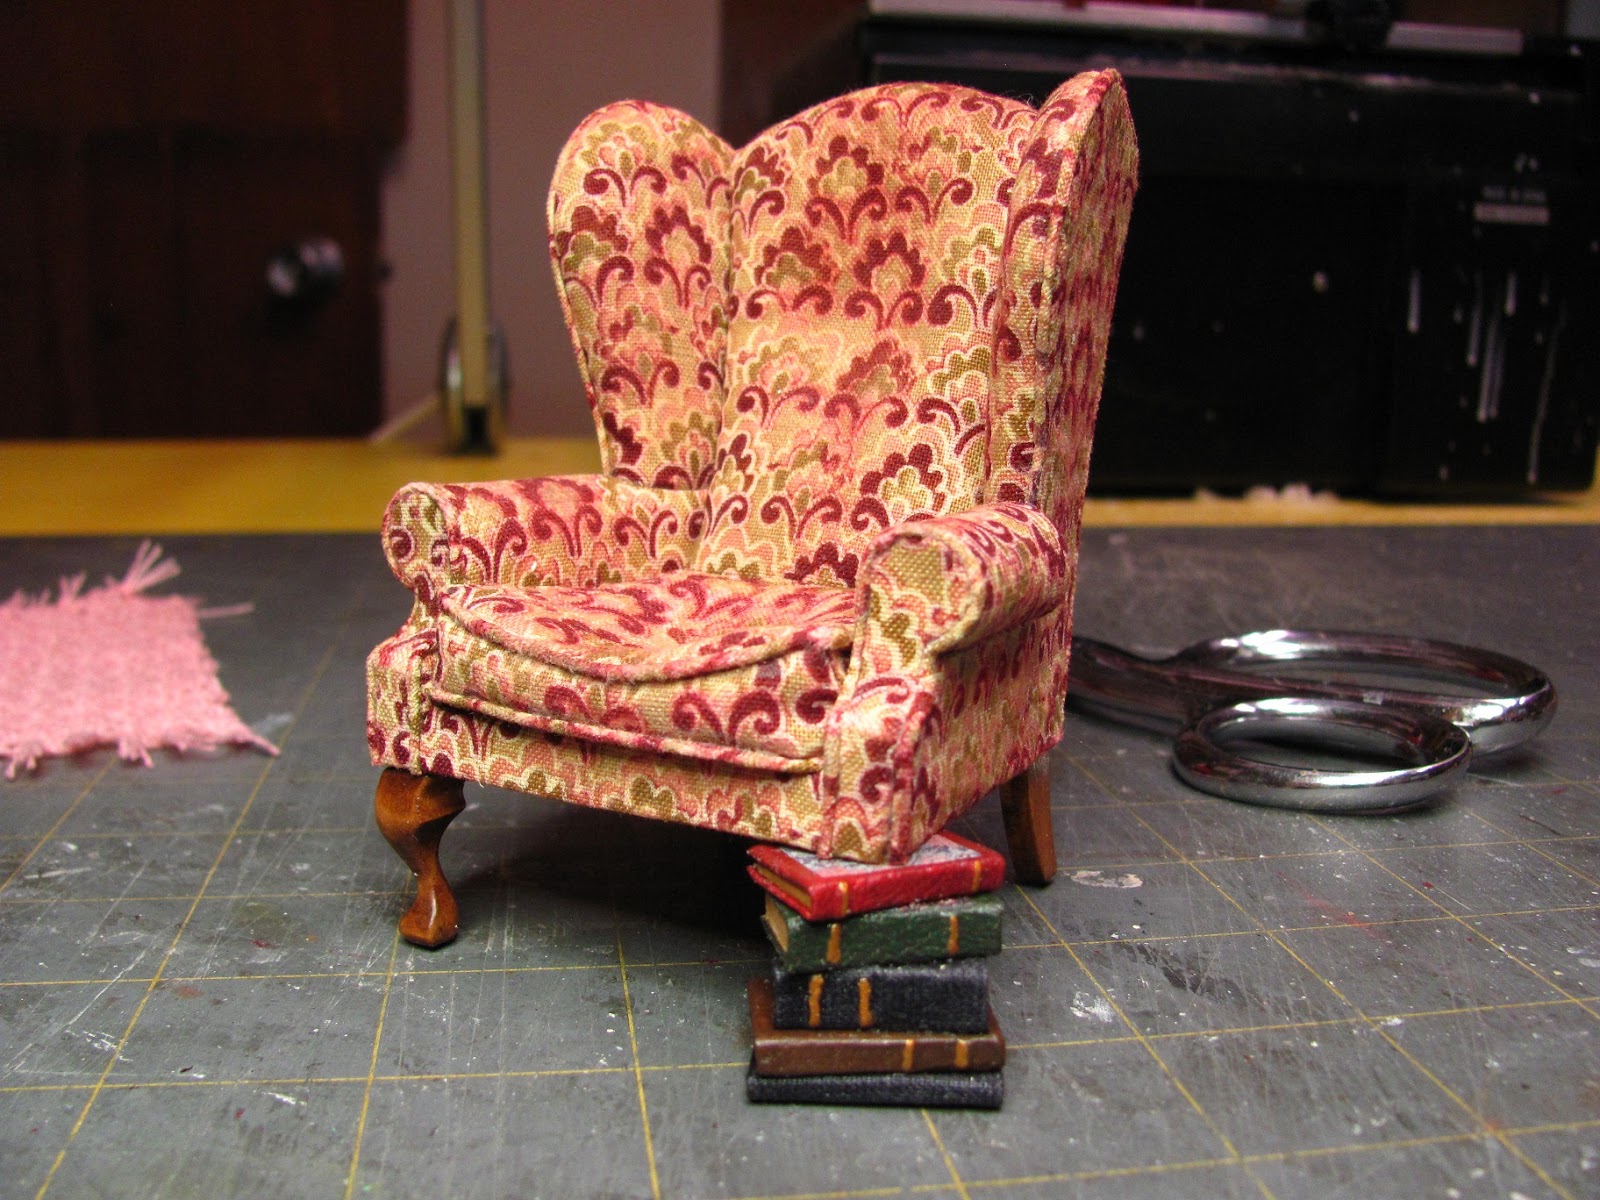
This is a picture of the finished chair, aged, with books for a front leg and the afghan steamed into place.
I bought this fabric at a quilting store.

I have some little books all ready made for the front leg. If you need to make books there is a tutorial in the "Things to do, Things to see" list at the left of the blog.

Tigger is my helper today.
Get your legs started with the first coats of paint if you are using my kit. I am using some wooden ones for my my chair today. Work on your legs through out the tutorial so they will be ready when you are finished with the chair.

Make your chair to having the wings, arms and sides upholstered.
This would be the 27th picture and you would be starting with the 28th picture working with the back cushion.
 Soften the top edge of the back cushion with your thumbnail. Draw an oval on the back cushion with the bottom of the oval 1 1/4" from the bottom and the oval is 1 1/4" long.

Cut the oval out. Slant the craft knife like I have in the picture.

This is what I cut out.

This is the back cushion.

Cut the batting for the back cushion according to the instructions in the kit.

Use tacky glue to glue the first layer on, the smallest piece is the first layer. Apply glue into the depression you cut and press the batting into the glue.

You should be leaving a depression in the back cushion.

I've glued on the next layer, applying glue to the foam core and into the depression. Press the batting into the depression.

Glue on the last layer the same way.
Dry fit the back cushion into the chair and trim off the extra batting at the top. Trim the batting even with the back of the chair.
I cannot emphasize enough about dry fitting, this only makes the job of putting anything together easier.

I apply a large amount of glue stick glue into the depression. This glue is for the fabric to be held in the depression.
This glue won't come through and won't get hard over time. You won't have a hard shiny spot in the middle of your back cushion.

Cut your fabric to fit the back cushion with enough to fold over to the back and glue.
Press the fabric into the depression and hold. You will have to keep pressing every so often to get this to stick.

Turn the cushion around and glue up the bottom.

Glue the sides.

Apply tacky glue to the top of the back and to the added piece of foam core on the seat.
It doesn't have to be this much glue but I wanted you to see the glue.

Press the back cushion into the chair.
I've cut wedge shapes into the extra fabric to make gluing easier, no wrinkles in the fabric.

Glue the extra fabric down.

This is what the top should look like.

Your back cushion is in and you can see the depression in the back.

Just going through the instructions here and on to the next steps.
Dry fit the back cover and trim if needed.
Apply glue stick to the card stock and press it onto your fabric.
Cut wedges into the extra fabric as shown in the picture.
Apply tacky glue to the back cover and glue the extra fabric down.

Apply tacky glue to the back of the chair and glue the back cover onto the back of the chair.

Just following the instructions.
Dry fit the front arm covers, trim the length if needed.

Apply glue stick to the card stock and press the front arm covers onto your fabric.
Trim around as shown in the picture.

Both arm covers with fabric.

Glue the front arm covers onto the front of the arms using tacky glue.

I am dry fitting the front seat base cover.
Can you see that the ends are touching the sides of the front arm covers?
Trim a little off of the ends. There should be enough space left between these pieces to fit piping into.

I've trimmed off a bit to leave room for the piping.

I've applied glue stick to the card stock and pressed it onto my fabric.
The fabric was trimmed and glued the back of the cover leaving the top extra fabric unglued. The top is glued to the top of the seat base.
I've applied tacky glue to the front of the seat base and glued the front seat base cover onto the chair.

I've drawn a line where I want to cut out the seat cushion.
Leave about a 1/4" on the sides and at the back of the cushion.

Cut out the foam core just as you did on the back.

Cut out the batting according to the instructions.
Use tacky glue to glue the layers in just like the back cushion.

I've glued the second layer onto the seat cushion.

Glue the last layer on beginning with gluing it to the bottom of the cushion.

Fold it over to the top.
Use the glue stick on the top of the last layer of batting to glue the fabric into the depression.

Use tacky glue to glue the fabric to the bottom side of the seat cushion.

I've got the fabric glued to the bottom of the seat cushion here. I've turned the cushion over to try to show you the glue stick on the surface of the batting.

Press the fabric into the glue on the top of the cushion and fold the rest of the fabric to the bottom of the seat cushion and glue using tacky glue.
Press the fabric into the depression on the top of the cushion.

Apply tacky glue to the sides of the foam core, smear the glue onto the fabric, too.

Fold the sides in.
Press the fabric onto the foam core.
Press the fabric together.

Apply tacky glue to the fabric and foam core and fold the top fabric down.
Be sure to press the fabric together, do you see that I've done that at the bottom of the cushion?

Trim off the extra fabric.

I am pressing the fabric down into the depression. You will have to keep doing this for a bit to get it to stick just the the depression in the back cushion.

Here is the cushion in the chair.

This is what I call "sat in", it's not aged but still has a lot of personality for a scene.

Here I am showing the piping fitting into the space between to two covers.

I'm not showing how to make piping, I have a tutorial for that in the list at the left of the blog. I also show pictures of making piping in the pages listed at the top of the blog. You can click on the Queen Anne Wing Chair and look at those pictures to see how the piping has been made if you don't have this kit.

Now, to the aging. You can go too far really quickly so go slowly.
I use 220 sand paper and chalk from the scrap booking isle. You could use eye shadow, also.
There is an art to aging and I admire those that really know how to do it artfully. I am sharing what I do and you can explore it more.

Looking at a piece of used furniture is helpful to see just where the wear spots are.
I've sanded into the depressions and along the front seat cushion on the piping.
I've sanded the arms and the piping on the arms.

Do you see that I've sanded through the piping on the arm?
Look at the piping on the seat cushion.
I give the whole chair a good sanding just to dull the color.

I've put a bit of brown chalk on my finger and I will lightly touch the chair where I want the dirt to be.
Since I've sanded the fabric and taken off any kind of sizing the fabric had the chalk will absorb quickly, be careful.

I've put my dirt on the back cushion into the depression, in the seat cushion, especially at the front edge and on the arms along their front edges.
I've also added dirt along the top of the wings and along the bottom edge. Again, looking at a used chair does help.

I've been working on my legs through out this tutorial and they are finished.
I've drilled the holes into the bottom and glued the legs in.

The books have been dumped onto the table and I will begin to choose which ones I want and will fit.
Even after the books are made you can take pages out to get the books to fit under the chair.

I have a stack.

I've used a little tacky and a little wood glue to glue the books together. There is mat board on each end of the stack so the clamps don't make marks on the books. Leave these clamped until good and dry, a few hours or overnight.

Dry fitting again.

Use a large pin or "T" pin to make a hole for your drill bit.

Drill a hole into the stack and glue a tooth pick into the hole.
Trim off the tooth pick to about a 1/4" long.

Drill a hole into the bottom of the chair and glue the tooth pick and books to your chair.
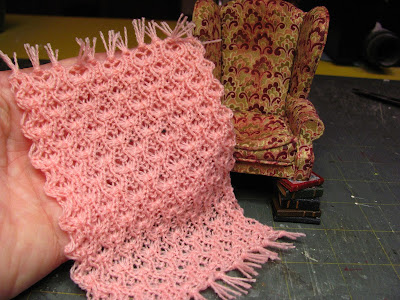
This is the afghan I am going to steam into the chair.

I wrap the chair in aluminum foil so the steam doesn't hurt the chair.

Fold the afghan like you would to make a paper fan. Try to put as many folds in it as possible.

I put my afghans over the top of the chair.
Drape the afghan and put in as many pins as your need to keep it the way you like it.

Pins in the front of the chair.

Get your iron hot or if you have a clothes steamer you can use that.
Get the afghan wet with steam. Try not to touch the afghan during this time, let the steam do it's work.

Move the chair around to be able to get the steam everywhere on the afghan.
Make sure you are seeing steam rising off the iron, it's the steam that makes this work.

I've taken just a few pins out. Leave the afghan to dry, don't touch it, don't remove it, yet.

Carefully remove the afghan when it is dry and take the foil off the chair.
Drape the afghan back onto the chair.

There you are.
If you have an odd piece of miniature furniture that you aren't using right now try this out. This makes a nice focal point in a miniature scene.
Questions and pictures use camceiling@frontiernet.net.
TTUL Kris
I know the pictures that are in the kit's instructions are small and if you are unfamiliar with building and upholstering a piece of miniature furniture this can be confusing. If you have purchased a kit feel free to click on your kit and use the enlarged pictures to help you with finishing your piece of miniature furniture.
As always I invite you to contact me if you have any problems. I want you to be successful and I will be very happy to help you. camceiling@frontiernet.net is my e-mail address.
Working on clearing up the pictures on the future kits but I wanted to make available the enlarged pictures for you.
I would also like to mention that I use only 100% cotton fabric for upholstering. I do not buy this on the internet. I do forget that not all people are familiar with fabric stores or fabric departments. I love fabric, I used to own a fabric store and I taught quilting. Please, when looking for fabric to upholster your miniature furniture use 100% cotton at least for the first time. Other fibers are difficult to glue and will just make everything harder for you.
Quilt shops, Joann's, Hobby Lobby and of course Walmart have 100% cotton fabric for quilting. Take a piece of furniture with you so you can judge if a print or stripe will be the correct scale and when it comes to upholstering that is a personal choice.

I am showing you pictures of my Halloween chairs that I used to sell all ready upholstered.
This chair is available as the Estate chair, #1229 from Hobby Builders.
Remember, I buy my fabrics from quilting stores, Joann's and Walmart.

This would probably be considered a medium scale print but on this chair the print worked just fine.
Be sure to take a piece of miniature furniture with you when you are choosing fabrics.


When I began the kits I had miniaturists ask if I was going to have this kit available, I do and you can order it from Hobby Builders Supply, item #1241.
I am going to show you how I age this chair. No, I am not giving a pattern. I am showing you a technique that you can use on other upholstered furniture not just this piece.
I will also show you how to steam an afghan in place.
The bottom picture is of the "Bits and Pieces" chair. This also can be aged or just sat in like the bottom picture shows.
The books being used are from the how to on books, that is listed on the left, "Things to do, Things to see".


I am keeping a promise to some miniaturists by making a tutorial on how to make "Lottie's Chair" from the Queen Anne Wing Chair kit.
Again, I am not including a pattern for those that do not have the kit. I am showing you the steps I take to age using sand paper and chalk. You can take off a front or back leg and use books to prop up your chair. I also show you how to steam an afghan into place.
This is a picture of the finished chair, aged, with books for a front leg and the afghan steamed into place.
I bought this fabric at a quilting store.

I have some little books all ready made for the front leg. If you need to make books there is a tutorial in the "Things to do, Things to see" list at the left of the blog.

Tigger is my helper today.
Get your legs started with the first coats of paint if you are using my kit. I am using some wooden ones for my my chair today. Work on your legs through out the tutorial so they will be ready when you are finished with the chair.

Make your chair to having the wings, arms and sides upholstered.
This would be the 27th picture and you would be starting with the 28th picture working with the back cushion.


Cut the oval out. Slant the craft knife like I have in the picture.

This is what I cut out.

This is the back cushion.

Cut the batting for the back cushion according to the instructions in the kit.

Use tacky glue to glue the first layer on, the smallest piece is the first layer. Apply glue into the depression you cut and press the batting into the glue.

You should be leaving a depression in the back cushion.

I've glued on the next layer, applying glue to the foam core and into the depression. Press the batting into the depression.

Glue on the last layer the same way.
Dry fit the back cushion into the chair and trim off the extra batting at the top. Trim the batting even with the back of the chair.
I cannot emphasize enough about dry fitting, this only makes the job of putting anything together easier.

I apply a large amount of glue stick glue into the depression. This glue is for the fabric to be held in the depression.
This glue won't come through and won't get hard over time. You won't have a hard shiny spot in the middle of your back cushion.

Cut your fabric to fit the back cushion with enough to fold over to the back and glue.
Press the fabric into the depression and hold. You will have to keep pressing every so often to get this to stick.

Turn the cushion around and glue up the bottom.

Glue the sides.

Apply tacky glue to the top of the back and to the added piece of foam core on the seat.
It doesn't have to be this much glue but I wanted you to see the glue.

Press the back cushion into the chair.
I've cut wedge shapes into the extra fabric to make gluing easier, no wrinkles in the fabric.

Glue the extra fabric down.

This is what the top should look like.

Your back cushion is in and you can see the depression in the back.

Just going through the instructions here and on to the next steps.
Dry fit the back cover and trim if needed.
Apply glue stick to the card stock and press it onto your fabric.
Cut wedges into the extra fabric as shown in the picture.
Apply tacky glue to the back cover and glue the extra fabric down.

Apply tacky glue to the back of the chair and glue the back cover onto the back of the chair.

Just following the instructions.
Dry fit the front arm covers, trim the length if needed.

Apply glue stick to the card stock and press the front arm covers onto your fabric.
Trim around as shown in the picture.

Both arm covers with fabric.

Glue the front arm covers onto the front of the arms using tacky glue.

I am dry fitting the front seat base cover.
Can you see that the ends are touching the sides of the front arm covers?
Trim a little off of the ends. There should be enough space left between these pieces to fit piping into.

I've trimmed off a bit to leave room for the piping.

I've applied glue stick to the card stock and pressed it onto my fabric.
The fabric was trimmed and glued the back of the cover leaving the top extra fabric unglued. The top is glued to the top of the seat base.
I've applied tacky glue to the front of the seat base and glued the front seat base cover onto the chair.

I've drawn a line where I want to cut out the seat cushion.
Leave about a 1/4" on the sides and at the back of the cushion.

Cut out the foam core just as you did on the back.

Cut out the batting according to the instructions.
Use tacky glue to glue the layers in just like the back cushion.

I've glued the second layer onto the seat cushion.

Glue the last layer on beginning with gluing it to the bottom of the cushion.

Fold it over to the top.
Use the glue stick on the top of the last layer of batting to glue the fabric into the depression.

Use tacky glue to glue the fabric to the bottom side of the seat cushion.

I've got the fabric glued to the bottom of the seat cushion here. I've turned the cushion over to try to show you the glue stick on the surface of the batting.

Press the fabric into the glue on the top of the cushion and fold the rest of the fabric to the bottom of the seat cushion and glue using tacky glue.
Press the fabric into the depression on the top of the cushion.

Apply tacky glue to the sides of the foam core, smear the glue onto the fabric, too.

Fold the sides in.
Press the fabric onto the foam core.
Press the fabric together.

Apply tacky glue to the fabric and foam core and fold the top fabric down.
Be sure to press the fabric together, do you see that I've done that at the bottom of the cushion?

Trim off the extra fabric.

I am pressing the fabric down into the depression. You will have to keep doing this for a bit to get it to stick just the the depression in the back cushion.

Here is the cushion in the chair.

This is what I call "sat in", it's not aged but still has a lot of personality for a scene.

Here I am showing the piping fitting into the space between to two covers.

I'm not showing how to make piping, I have a tutorial for that in the list at the left of the blog. I also show pictures of making piping in the pages listed at the top of the blog. You can click on the Queen Anne Wing Chair and look at those pictures to see how the piping has been made if you don't have this kit.

Now, to the aging. You can go too far really quickly so go slowly.
I use 220 sand paper and chalk from the scrap booking isle. You could use eye shadow, also.
There is an art to aging and I admire those that really know how to do it artfully. I am sharing what I do and you can explore it more.

Looking at a piece of used furniture is helpful to see just where the wear spots are.
I've sanded into the depressions and along the front seat cushion on the piping.
I've sanded the arms and the piping on the arms.

Do you see that I've sanded through the piping on the arm?
Look at the piping on the seat cushion.
I give the whole chair a good sanding just to dull the color.

I've put a bit of brown chalk on my finger and I will lightly touch the chair where I want the dirt to be.
Since I've sanded the fabric and taken off any kind of sizing the fabric had the chalk will absorb quickly, be careful.

I've put my dirt on the back cushion into the depression, in the seat cushion, especially at the front edge and on the arms along their front edges.
I've also added dirt along the top of the wings and along the bottom edge. Again, looking at a used chair does help.

I've been working on my legs through out this tutorial and they are finished.
I've drilled the holes into the bottom and glued the legs in.

The books have been dumped onto the table and I will begin to choose which ones I want and will fit.
Even after the books are made you can take pages out to get the books to fit under the chair.

I have a stack.

I've used a little tacky and a little wood glue to glue the books together. There is mat board on each end of the stack so the clamps don't make marks on the books. Leave these clamped until good and dry, a few hours or overnight.

Dry fitting again.

Use a large pin or "T" pin to make a hole for your drill bit.

Drill a hole into the stack and glue a tooth pick into the hole.
Trim off the tooth pick to about a 1/4" long.
Drill a hole into the bottom of the chair and glue the tooth pick and books to your chair.

This is the afghan I am going to steam into the chair.

I wrap the chair in aluminum foil so the steam doesn't hurt the chair.

Fold the afghan like you would to make a paper fan. Try to put as many folds in it as possible.

I put my afghans over the top of the chair.
Drape the afghan and put in as many pins as your need to keep it the way you like it.

Pins in the front of the chair.

Get your iron hot or if you have a clothes steamer you can use that.
Get the afghan wet with steam. Try not to touch the afghan during this time, let the steam do it's work.

Move the chair around to be able to get the steam everywhere on the afghan.
Make sure you are seeing steam rising off the iron, it's the steam that makes this work.

I've taken just a few pins out. Leave the afghan to dry, don't touch it, don't remove it, yet.

Carefully remove the afghan when it is dry and take the foil off the chair.
Drape the afghan back onto the chair.

There you are.
If you have an odd piece of miniature furniture that you aren't using right now try this out. This makes a nice focal point in a miniature scene.
Questions and pictures use camceiling@frontiernet.net.
Have fun, Expand on it, Make it better . . .
Just Keep Making Minis!
TTUL Kris
Subscribe to:
Posts (Atom)