

This is what we are going to make this month.

This is my inspiration, another picture from a full-size decorating catalog. This piece is small size even in human size furniture. I made it a little wider for us to make. If you want to make it larger just change the measurements.

When I want to make a piece of furniture I draft, or draw it in 1 inch scale on a piece of paper. I make notes about what materials I want to use where. Since it's already drawn in 1 inch scale all I have to do is to go to the drawing to take measurements.
This also good to keep for future reference.

Before we begin: I am going to use yellow wood glue or yellow carpenter's glue. Something like Elmer's or Titebond.
We are going to use mat board, it's 1/16 inch thick.
Get a new blade in your knife and keep your pencil sharp.

The first pattern we need is the bracket foot, I forgot to label them! So, the bracket foot is in the top left corner.
My patterns are made on card stock, this is paper that is as thick as a business card or greeting card. You can load your bracket foot into a program, copy and paste 6 of them and print them out onto regular copy paper. You can then use a glue stick to glue them onto a piece of mat board that is 3/8" wide or tall. OR, you can do what I did and just trace around my card stock pattern 6 times.

You can see my bracket feet all lined up on my 3/8" wide mat board.

To make the cutting easier I made a diagonal slice with my knife coming from the point in the middle of the foot. I then made my curvy cuts.
You can use scissors if you would like.

I have all of my feet cut out. To clean up the curves I used sand paper, 220 grit wrapped around a tooth pick or dowel.

For the top of the platform cut from mat board a rectangle 2-1/8" x 1-5/8".
I am using a low beam square, I ordered mine from Micro Mark.

Keep a square handy to check your cuts.

Measure and draw lines 1/32" from the edge of 1 long side and the 2 short sides.
We will use these lines to align the feet.

Turn the mat board over.
Use sand paper, 220 grit, to sand quarter round the 2 short sides and the 1 long side that has the line drawn under it. The side you are leaving unsanded will be the back.
Don't sand on the side that you drew your lines on.

Glue the front feet on just behind the line.

Glue the side feet on behind the front feet and just behind the line.

To fill in the back I want you to measure the width between the back feet. It looks like my measures 1-15/16". I will cut a piece of mat board 3/8" wide and 1-15/16" long.

Glue this piece in.

I've gone back to my drawing to measure for the sides.
Cut from mat board 2 rectangles 2-11/16" x 1-1/2".

For the example look at the mat board on the right.
I've measured up from the bottom 1-7/8", I made a mark on the front, that's on the left hand side of the mat board. I then measured from the back, at the top, that's on the right hand side of the mat board, 7/8". I drew a line connecting the two marks. This is the slant front of the desk. Do the same thing for the other piece of mat board.

Cut on the lines you just drew.

Next, we are going to cut the front and a shelf support.
Measure the height of the front of the desk, starting under the slant you just cut and to the bottom of the side. That's the height.
I want you to measure. If I told you the measurement it might not be right for you, it may be off, even if it's off just a tiny bit, it can be a big difference in miniatures.

The width of this piece is 1-7/8". Cut 2 of these.
Cut a back the height of the side, 2-11/16" and 1-7/8" wide.
In the picture we have the platform with the feet glued on, the back with the 2 sides next to it and the front and shelf support, they are the same size.

Glue the shelf support onto the back, bottom and sides are even.

Glue the back between the sides.

Glue the front between the sides.

Center and glue the desk onto the platform. The back of the desk will be even with the back of the platform.

Measure and cut the desk surface, mine measured 1-7/8" the width of the front and back, and 2-1/4" long.
I sanded quarter round the front and sides. Sanded the sides back about 7/8", the rest of the sides are inside the desk.
Glue this into the desk, the rounded edge is down.

The desk has a 2 part top.
The bottom is 1-1/16" x 2-3/16". The top is 1" x 2-1/16". Cut these out from mat board.
Sand quarter round 1 long side and the 2 short sides.

Center and glue the two pieces together.
Center and glue the top onto the desk. The back of the top is even with the back of the desk body.
Looking like a desk, isn't it?
I want to talk a little about reveals, that's the space that's left between the two pieces of the top, between the two quarter rounded edges or the space left between the platform edge and the side of the side. I leave a lot of reveal. In full size furniture there isn't that much reveal left. I do this because I like to tell you measurements that are on the "line". O.K., that doesn't mean that I won't ever say, "It's just a bit over the line." or "It's just before the line." But I try to keep that to a minimum. So, what all this means is, if you want the reveals to be smaller please feel free to do that.
If you want to stop here with this style of desk skip ahead and I show the drawer fronts and pigeon holes.
And, if I didn't mention this before, you can always change the measurements to fit what you need.

On to the cabinet top.
Cut a piece of mat board 2-9/16" x 3-3/4".
Measure and draw lines on this piece at 7/8" and 1-11/16".
A note here: If you have something you want to put in this cabinet measure it now. I always forget this and my shelves are never far enough apart. We are going to add a 1/16" bottom to this section so take that into consideration. I wanted to put those little Chrysnbon footed and covered dishes, you know the ones that are depression green and pink, well, that didn't work out. Adding to it, I even made two of these cabinets, one to try out and one to take pictures of. One of these days . . . .

Cut a back and 2 sides from this piece. The back is 1-3/4" wide and the two sides are 3/4" wide.

Glue the sides onto the back, you are covering the edge of the back with the side.

Glue the other side on. The lines are on there for the shelf alignment.

Measure the inside of the cabinet for shelf depth.
It looks like I'm at 11/16".

Cut a strip of mat board at least 7-1/4" long and the depth of the inside of your cabinet.

Cut four pieces 1-3/4" long, that's the measurement of the width of your back.

Glue a top and bottom in. Glue your shelves in on the lines. They should be even, but if you are like me my lines aren't always even and I have to make a little adjustment.
Center and glue the top onto the desk bottom. The backs are even.

I cut a strip of mat board the width of my front and then traced the pattern.
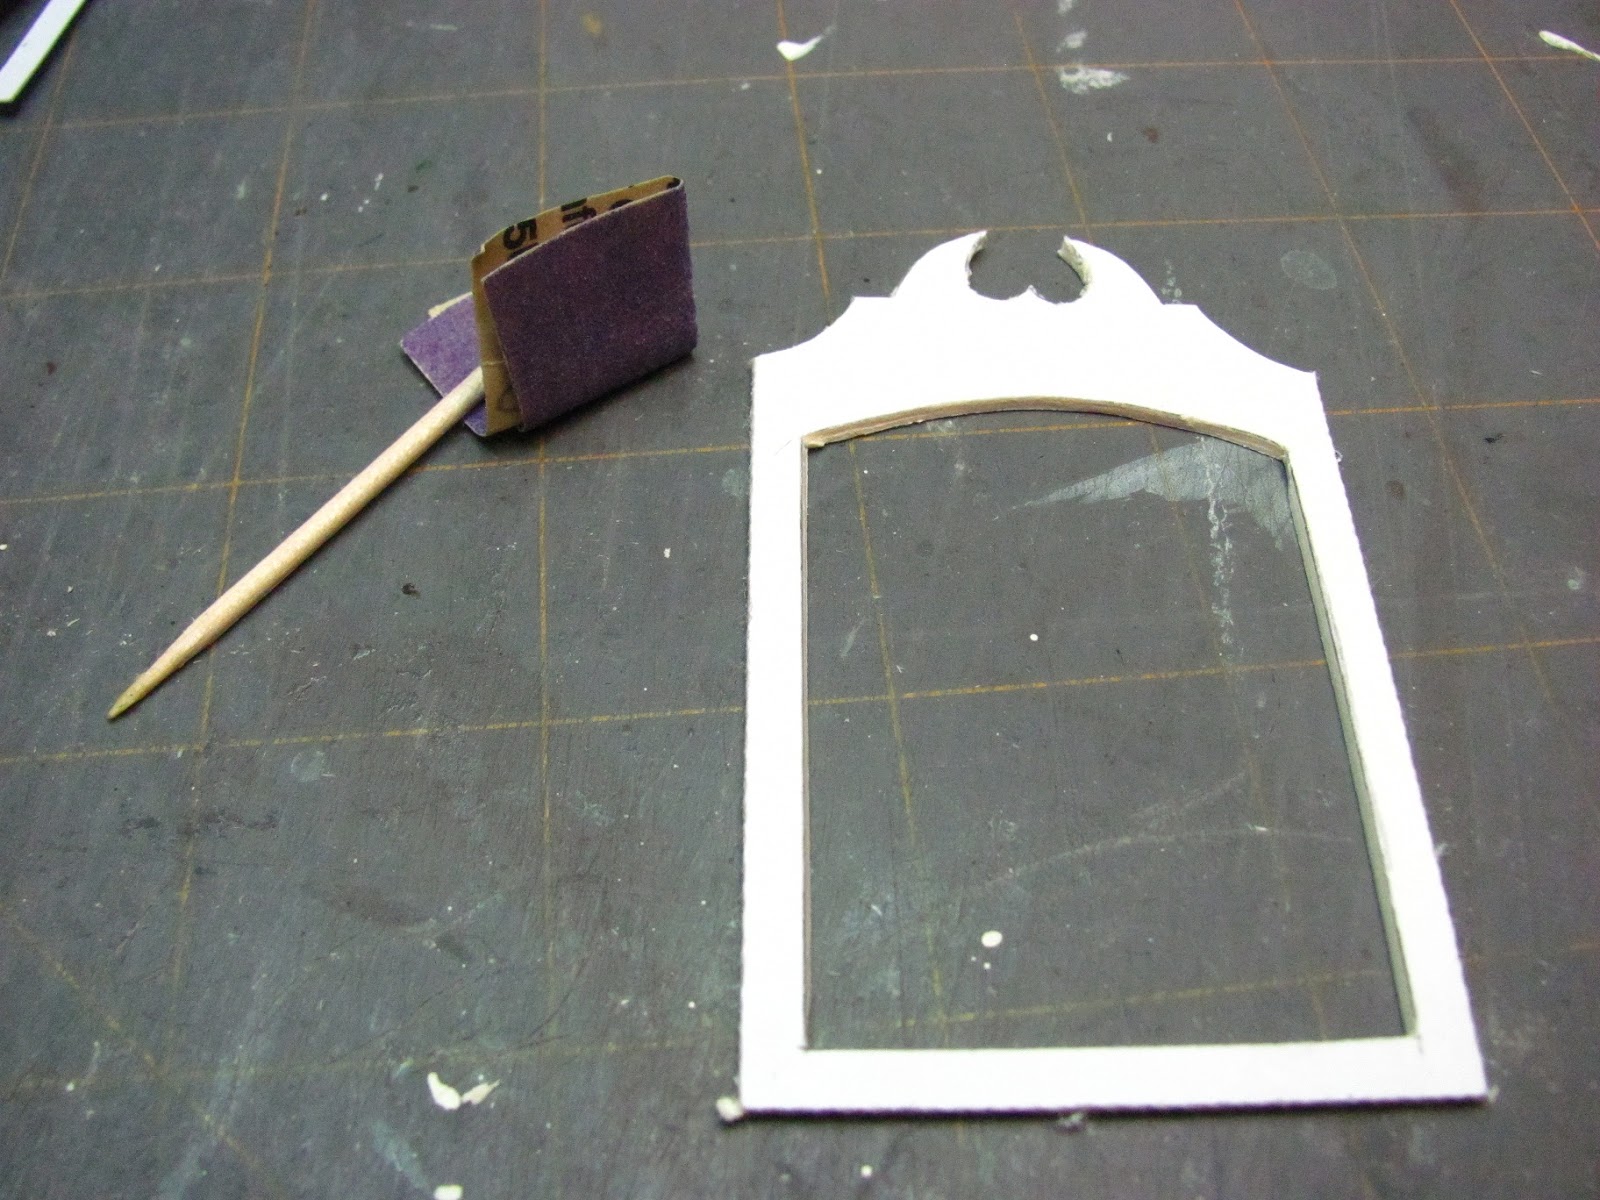
I cut out the front and cleaned up the curves with sand paper.
Save the inside piece that you cut out, you can use that as a pattern for the "glass".

I am just fitting the front, don't glue it on yet. Makes painting easier if you leave this off. I found this out when I made the first one.

We are going to add some dimension to the top by making what is called a broken bonnet top.
In the patterns up at the top you will see that I have already drawn the two pieces we will use. But you can make your own by drawing on the front pattern 3/16" and 1/8" away from the curved top. I think you can see where I did that on the front pattern. Just letting you know how I did it.
You could also print them onto card stock and then cut them out.

Glue three together, then glue the other three together.

Dry fit before you glue.
Make sure all your edges are even, make adjustments if needed.
Glue the pieces on.

We only need to copy 4 of the smaller patterns.
Make your smaller pieces the same as you did the large ones.

Glue two pieces together and then glue the other two pieces together.

Dry fit, make sure everything fits right, then glue the two pieces onto the first ones.

I measured the width of the top, where I added on the card stock, then added a bit more to get 5/32", you can change this if you want.
I cut a strip of card stock that width.

With the back of the top even with the edge of the card stock, I glued the strip onto the edge of the top.
I cut the strip off even the the side.

I glued 2 layers of card stock onto each side of the top.

Again, I am just trying the front on to see how it looks.
If you are have trouble with the accuracy of your cuts you probably need a new blade by now.
Let's talk about the finial, now. You can get metal or wooden finials from miniature suppliers. You can also make one from beads and findings. I usually don't leave my table area to do the blog so I just used what I had: I couldn't find a bead the right size so I cut a piece of paper 3/4" square, wadded it up, un-wadded, added glue and wadded again, rolling it into a ball; I cut out a 3/8" circle, cut it in half and made a cone, I glued the cone on the ball; I did find a tiny bead for the top of the cone, I glued the bead on; then I used paper punches to punch a hole and punched another hole around the first hole to make a circle with a hole in it and glued that onto the ball/cone at the seam where the cone is glued to the ball. I have a close up of the finial later on, you will see what I did.

Use the door pattern to trace and cut a door from mat board.
Before you cut out the center, sand quarter round the four edges.

Cut out the center.

This is the door on the front.

We are going to cut the drawer fronts from one piece of mat board.
Measure between the bottom of the desk surface and the top of the platform. For me that measured 1-13/16".

Now, measure from side to side across the front. Leave a little of the front showing, about 1/32" on each side.
With these two measurements cut out a piece of mat board for the drawer fronts.

To make the pigeon holes I measured inside the desk. Mine measured 1/32" over 3/4". So I'm going to cut the dividers just on the other side of the 3/4" line.
Cut a strip at least 3" long.
Cut two dividers 3/4" long.

Cut two more pieces, these are 1/2" long.
On the dividers I measured 5/16" up from the bottom and drew a line.
I glued the 1/2" pieces on that line.

Measure for two drawer fronts. Mine are just over 1/2" x just over 1/4". Sand all four edges quarter round. Glue on the drawer fronts.

I have provided a couple of patterns for the decorative bridge that connects the two dividers and drawers. You will need to dry fit the two dividers into the desk and measure the distance apart. I made the bridge from two layers of card stock. When I had it the right width I glued it to the dividers.

I have everything sitting in place to see how it looks. I haven't made the finial for the second secretary, yet.
I use acrylic from a poster frame that I bought at Wal-Mart. I used the inside of the front that I cut out for a pattern. I cut the acrylic with a craft knife and made it fit into the hole. After the secretary is painted and loaded I will fit the acrylic in the hole and then glue the door on.

I am not a faux finish painter! But I will explain what I did here.
First of all I painted the pigeon hole section a very light pink.
Then I painted everything else a light ivory. Remember I do not have the drawers glued on, the front and the door aren't glued on either.
I painted the light ivory a couple of coats, sanded with 220 or higher grit. Painted another coat.
I mixed up a little darker ivory with glazing medium and then using an old brush with ruffled bristles I dabbed and used my thumb to blend. I even dabbed on the pink pigeon hole section.
While this dried I looked for a picture in my Dover catalogs. Dover is a book publisher, lots of great resource books. I keep the catalogs for things like this.

Here is a close up of my fancy finial.
I do wish I could have put the Chrysnbon dishes in but I did find some plates I painted years ago and they fit.

I found a picture. I rough cut it out. I brushed an acrylic finish on the picture, I used Delta's PermEnamel. I let this dry thoroughly.
I glued on the drawer fronts, the front and glued in the pigeon hole section. Let them dry.
I used Modge Podge to glue the picture on. I pressed the picture on and carefully pressed into the grooves where the drawers come together.
I used a sharp blade to cut the paper in the grooves.
Let this dry.
I painted on a couple of coats of acrylic varnish, again I used Delta's PermEnamel.

I sanded, I especially sanded over the picture. I took some of the brightness away and sanded some parts of it more than others.
Gave it another coat of varnish.
I mixed a little burnt umber with glazing medium, using my old brush I dabbed over where I thought it looked nice. I worked the paint with my fingers or a stiff brush to work the paint into cracks and grooves.
I let that dry and gave the whole thing another coat of acrylic varnish.
I robbed some hardware from and old "House of Miniatures" furniture kit for the drawers and door front.
I put my plates in, fitted the acrylic into the hole and lightly glued the door on. I had a left over key from a package of door knobs. I cut the tip off, drilled a hole, glue a keyhole escutcheon on and glued the key into the hole. To finish things off I made a tassel for the key. I see this in all the fancy decorating books, so I thought I would do it, too.
My faux finishing is just trial and error and it goes fast so I don't think about taking pictures of it.
You could change the size of this and even make with with double doors.
I hope your "lady of the house" enjoys her new secretary.
I've orders to finish, so I'm off to the breezeway . . . . .
Have fun, expand on it, make it better . . .
Just keep making minis!
Kris